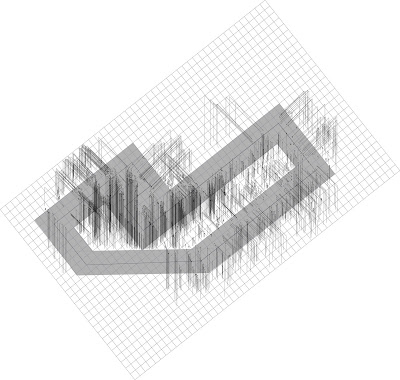
My model is a construction of the drawing below. The grey part is the track that I want the camera to follow and the lines are where the wires are to be inserted so I can then attach the LED. The space is made up of drawings from the films of the Southbank. They are arranged in an order which i explored and filmed each space.
Lauren McEwen's Blog
Friday, 27 May 2011
Test Model number three
Here is an image of the model. I have simply constructed the model with a wood base, inserted metal rods and the attached the LED lights. The lights hang down over the space where the camera is going to run through. Below this image is some stills from the test film made in this space.
Making the 2D space into a 3D space
From the traces of the drawings which came from Southbank. This is how I plan to remake the areas that I filmed. I have simply drawn a grid which is at the base of the box, then i have drawn a straight-line down from every light point until it meets the grid. This is the way i plan to build the model. I will make a test model and then I will make another drawing of the final space, which I plan will be an arrangement of the spaces combined.
Creating the new space from the images
Drawings of the new Spaces
All of these spaces have come from the films that I have made on the Southbank. I have used the same process of dividing the stills up and duplicating them to fill the light path so we can see how the light has travelled.
Tuesday, 10 May 2011
Test Box number two
This is the second box that I have created, you can see that it still has the path leading through the centre so the camera can travel through. The sides of the box do expand and decrease in size, I was hoping this would show the space opening up and closing in due to the lights being placed on the walls.
The film is showing you exactly what was in the box at the time of filming, we see the space. Although this was a test just to see how the camera moved through and filmed the space, it worked extremely well and just needs to be pushed to the space being designed. I will use the same technique of filming the space for the final model.
The film is showing you exactly what was in the box at the time of filming, we see the space. Although this was a test just to see how the camera moved through and filmed the space, it worked extremely well and just needs to be pushed to the space being designed. I will use the same technique of filming the space for the final model.
Monday, 9 May 2011
Light Space
Here is the start of the spaces I have begun to create. These images show the spaces that i have created. This was a quick test. I set up all the LED lights and placed them on the inside walls of the long rectangular box. I just wanted to see how the lights behaved if they were placed in the box and then filmed.

Making of the LED lights
These LEDS need to be created so I can create my new space.
You need a scalpel, electrical tape, LED and a battery.
The first step is to cut some strips of electrical tape. This will be used to attach the battery to the LED.
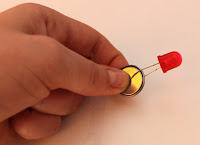
The second step is you need to test that the battery and LED will work, the shortest leg of the LED attaches to the + side of the battery and the longest leg attaches to the - side of the battery. If you push the legs down so they are in contact with battery the light should come on.
The third step is to tape the battery and the legs of the LED into position, this will keep the light on. If you do need to turn the light off you just need to pull one leg out from the battery.
These are all of the LED lights that I have assembled so far. I will use these in the first space I create.
What to do next?
The two next steps are:
1- Make a Master film
The master film will an assembled film of the footage I have recorded up to this point. I will have to go through each film I have made, decided what footage I want in the film and assemble, edit and rearrange until I am happy with the Master film. The Master film will complete my recording and exploration into my idea.
2- Create my own space defined by lights and then film.
This step is important as the films I have recorded up to this date are recordings of space that physically exist. Through reducing everything down into only visible light it gives a new understanding of the space, also the possibility that these recordings can become new spaces.
I will be designing a new space that is defined by lights. I will be able to control what the camera sees and what it is recording. For this I will need lots of LED lights, lots of 3v watch batteries, electrical tape and cardboard. I plan to create boxes that will be dark inside and will attach the lights onto the surfaces inside. The camera will move through the centre of the space on a pully system so it creates a smooth fly through.
Tuesday, 3 May 2011
Still experimenting along a journey with the Camera
All of the filming that has happened whilst being in a car and driving along. It definitely improves the smoothness of the journey and gives a fly through of the space, which is what I was hoping for.
Subscribe to:
Comments (Atom)


